

Rodent-Proofing with Smart Home Sensors: A Room-by-Room Early-Warning System That Actually Works
Rodents don’t usually announce themselves with a dramatic scurry across the kitchen floor. In many homes, the first “proof” is subtle: a faint scratching noise behind a wall at night, a single droppings trail in a pantry corner, or a sudden mystery smell near a cabinet toe-kick. By the time you see one mouse, you may already have an active entry route and a comfortable nesting spot.
The good news: you can catch rodent activity earlier—often days or weeks earlier—by using the same smart home tools people already install for comfort and security. This article explains a practical, creative approach: building an early-warning system using inexpensive sensors (noise, motion, temperature, humidity, and leak detection) and pairing that data with targeted rodent-proofing. It’s not about turning your home into a lab. It’s about using signals you’re already collecting to stop infestations before they start.
Why “smart rodent-proofing” is trending in home services
Traditional rodent-proofing focuses on exclusion (sealing entry points) and sanitation (removing food and nesting materials). That’s still the foundation. What’s changing is how homeowners detect the start of a problem. Smart sensors can flag the conditions rodents love—warmth, water access, quiet voids, and regular nighttime movement—so you can intervene quickly.
Rodent prevention is also increasingly tied to broader home resilience: weather extremes, higher food prices (more pantry storage), and more people working from home. You don’t need to guess where the problem is coming from; you can gather clues and respond with a plan.
The “Signals & Seals” method: detect activity, then lock it down
Think of this as a two-part strategy:
- Signals: Identify the rooms or voids with suspicious activity or rodent-friendly conditions using sensors and simple observations.
- Seals: Prioritize exclusion work where it will matter most—then verify improvement by watching sensor readings stabilize.
This prevents the most common frustration homeowners face: sealing random gaps without addressing the real route rodents are using.
Step 1: Use sensors to spot rodent-friendly conditions (before the rodents)
1) Temperature and humidity sensors: locate hidden “comfort zones”
Mice and rats seek warmth and stable shelter. Temperature/humidity sensors (the small puck-style ones used for HVAC optimization) can help identify areas that stay unusually warm in winter or damp year-round—two conditions that can correlate with nesting sites or access to water.
- Actionable tip: Place one sensor in the basement/utility room, one under the kitchen sink, and one in an attic or crawlspace access area for two weeks. Look for spots with persistently higher temperatures (near motors, pipes, appliances) or humidity spikes (slow leaks, poor ventilation).
- What to do next: Investigate the cause: condensation on pipes, poor dryer venting, a crawlspace vapor barrier issue, or a minor plumbing leak. Fixing moisture problems reduces rodent attraction and can also prevent mold.
2) Leak sensors: catch the “hidden watering hole”
A tiny drip behind a dishwasher or a slow leak under a sink can provide a steady water source. Many infestations persist because rodents don’t have to travel far for water.
- Actionable tip: Put leak sensors under the kitchen sink, behind the fridge water line (if you have one), behind the dishwasher, and near the water heater pan. Choose models that alert your phone.
- Real-world example: Homeowners often blame pantry items when mice keep returning, but a damp cabinet base from a pinhole leak can be the real magnet. Fixing the leak and drying the void makes baits and exclusion far more effective.
3) Motion sensors in “no-traffic” areas: detect nighttime movement patterns
Most standard security motion sensors are designed for big human movement, not a small animal. Still, when placed correctly, they can catch surprising clues—especially in confined areas where rodents run along edges.
- Actionable tip: Use a motion sensor in the garage aimed low along a wall (not across open air), in a basement near storage shelving, or facing the toe-kick gap under cabinets (if the sensor can be placed discreetly).
- What to watch for: Motion alerts between midnight and 4 a.m. in a space where no one should be moving are a strong reason to inspect for droppings, rub marks, gnawing, and entry points.
4) Sound and vibration clues: when “mystery noises” are actually data
Rodent scratching in walls is common at night, but it’s intermittent and easy to dismiss. Some homeowners use general-purpose noise monitors (often sold for monitoring babies, pets, or snoring) or even smartphone apps to capture a pattern: time of night, frequency, and location.
- Actionable tip: If you hear scratching in a specific wall, put a noise monitor in the adjacent room for a few nights. Keep notes of time and duration. This can guide where to inspect attic/basement lines and exterior penetrations.
- Practical caution: Pipes expanding, HVAC ducts popping, and branch taps can mimic rodent noises. Pair sound clues with physical inspection (droppings, insulation disturbance, gnaw marks) before you assume.
Step 2: Turn those signals into a room-by-room rodent-proofing plan
Kitchen: the “food + water + warmth” triangle
Kitchens are the highest stakes area because rodents can contaminate food-prep surfaces and stored ingredients quickly.
- Seal: Pull the stove and fridge (carefully) and inspect for gaps around gas lines, plumbing, and wall voids. Seal with appropriate materials: steel wool plus sealant for small gaps, metal mesh, or a proper escutcheon plate for pipe penetrations.
- Store: Move dry goods (cereal, flour, snacks, pet food) into hard containers. If you’ve ever found a single chewed bag, assume other bags are vulnerable.
- Verify: After sealing, your under-sink humidity and leak sensors should stabilize; motion alerts should drop if activity was routed through the kitchen.
Garage: the “open door” reality
Garages are common entry staging areas because doors open frequently and clutter provides cover.
- Seal: Check the garage door bottom seal and side weather stripping. Even small daylight gaps can be enough. Inspect where utilities enter (water, cable, electrical conduits) and seal appropriately.
- Reduce harborage: Store items in sealed plastic bins rather than cardboard. Rodents love nesting in corrugated boxes.
- Sensor placement: A low-aimed motion sensor near the interior door to the house can show whether activity concentrates near that transition point.
Basement/utility room: pipes, penetrations, and “hidden highways”
Basements often have the most penetrations—sump lines, HVAC ducts, electrical conduits, and sill plates with tiny gaps.
- Seal: Focus on the rim joist/sill plate area where the foundation meets framing. Seal cracks, and pay attention to any foam that looks chewed or disturbed.
- Moisture control: Use your humidity sensor readings as your “proof.” If humidity is consistently high, address drainage, dehumidification, or ventilation—rodent pressure often drops when dampness is solved.
- Data point to consider: Rodents can squeeze through surprisingly small openings. Even if you don’t measure exact gap sizes, treat any visible exterior-to-interior pathway as a priority to seal.
Attic: nesting potential with fewer human disturbances
An attic can provide warmth, quiet, and nesting material (insulation). It also hides activity until it’s advanced.
- Seal: Inspect roofline vents, soffit gaps, and where plumbing stacks and electrical masts penetrate. Ensure vent screens are intact and properly secured.
- Listen and log: If you hear activity overhead at night, use a sound monitor and note timing. Then inspect insulation for runways or compressed paths.
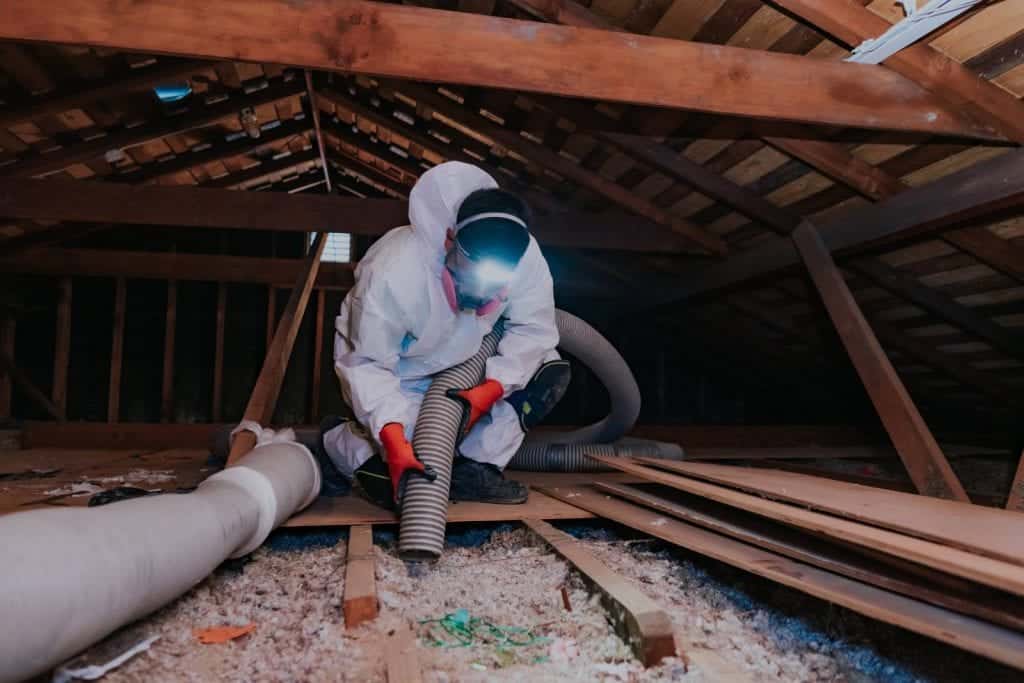
- Safety note: Attic work can be hazardous (heat, nails, low visibility). If you’re unsure, bring in a professional rodent-proofing service.
Step 3: Build a simple dashboard (without getting overwhelmed)
Smart home tools are only helpful if they lead to action. Keep it simple:
- Choose 3–5 sensor locations that match your home’s risk points: kitchen, garage, basement, attic access, and one “mystery noise” wall.
- Set alert thresholds you will actually respond to (e.g., leak detected, humidity above a set level, motion during sleeping hours).
- Create a two-week baseline before making changes, then watch what improves after sealing and repairs.
This approach mirrors how other home services use diagnostics first—like HVAC static pressure tests or plumbing leak detection—before making repairs.
When rodents become a public conversation (and why it matters at home)
Rodent activity isn’t just a private household concern; it’s frequently discussed as a wider urban and public health issue. For broader context and reporting on how communities manage rodent challenges, see coverage from BBC News reporting on rodents and city pest pressures. The takeaway for homeowners: local conditions (construction, weather swings, waste handling) can change rodent pressure quickly—making early detection and strong exclusion even more valuable.
Common mistakes when combining sensors with rodent-proofing
- Relying on sensors instead of sealing. Sensors help you find problems; they don’t stop entry.
- Placing sensors too high or too open. Rodents hug edges. Low, wall-adjacent placement often works better for motion detection.
- Ignoring moisture alerts. Water access can sustain rodents even when food is limited.
- Sealing only indoors. If you seal a gap under the sink but don’t address the exterior entry, rodents may reroute and appear elsewhere.
Conclusion: A smarter way to stay rodent-free
Rodent-proofing works best when you combine strong exclusion with timely information. Smart home sensors—humidity, leak, and motion in particular—can help you pinpoint where rodents are likely to travel, nest, or find water long before the problem becomes obvious. Use the “Signals & Seals” method: gather clues, fix moisture, seal the right gaps, and confirm success by watching alerts fade and readings stabilize.
If you want fast results, start small: place a leak sensor under the kitchen sink, a humidity sensor in the basement, and a motion sensor low in the garage for two weeks. Then act on what the data tells you. It’s a practical, modern upgrade to rodent-proofing—and it can save you from bigger repairs later.

Smart Rodent Proofing for Modern Homes: Comparing 5 Materials That Actually Hold Up (Spray Foam vs Steel Wool vs Copper Mesh + More)
Why “modern” rodent proofing needs a modern comparison
If you live in a newer build, a renovated older home, or even a “smart home” with gadgets everywhere, your rodent-proofing challenges can be weirdly different from what most advice assumes. You might have open-cell spray foam in places you can’t easily access, sleek siding with hidden weep paths, rooftop HVAC lines, EV charger conduits, or a tangle of low-voltage wiring for cameras and internet.
Rodents don’t care if your home is minimalist or historic—they care about warmth, food, and access. The good news: sealing entry points is still the #1 practical fix. The tricky part is choosing the right material for the job, because some “popular” options fail fast when exposed to weather, movement, or chewing.
Below is a comparison of five rodent-proofing approaches (really: sealing materials and methods) with real-world use cases, what they’re good at, and where they flop. If you’re trying to avoid repeat infestations and avoid patchwork repairs every season, this is the stuff that matters.
The quick standard: what you’re sealing against
You’ll see lots of numbers floating around, but a practical rule is this: if you can fit a pencil in the gap, you should treat it as suspicious. Mice can squeeze through surprisingly small openings, and rats can enlarge weak spots quickly. That’s why “soft” fillers are usually not enough on their own.
Before you seal, do a 20-minute exterior walkaround and note:
- Utility penetrations (AC lines, cable/internet, gas line sleeves)
- Garage corners and door edges (especially where weatherstripping meets concrete)
- Foundation vents and crawlspace access doors
- Roofline gaps, attic vents, and fascia intersections
- Under-sink pipe openings and laundry hookups inside
Now let’s compare the main approaches.
Option #1: Expanding spray foam (fast, but often misunderstood)
Best for
- Air sealing around irregular gaps where you can’t fit rigid materials easily
- Back-filling behind a more durable “chew barrier”
Where it fails
- Chew-through risk: Foam by itself is not a rodent barrier. If a mouse can smell airflow or food odors, foam becomes a temporary speed bump.
- UV and weathering: Exterior foam breaks down in sunlight unless protected.
- Overexpansion: It can bow trim, distort siding gaps, or create hidden voids that rodents use as highways.
Real-world tip
Use foam as a supporting layer, not the “wall.” If you have a 1–2 inch gap around a pipe, pack in a chew-resistant insert (like copper mesh) first, then foam to lock it in place. Indoors, keep foam away from heat sources and always follow the product’s cure and ventilation guidance.
Option #2: Steel wool (cheap, common… and not always great)
Best for
- Small interior gaps where moisture is minimal
- Temporary fixes while you source better materials
Where it fails
- Rust: In damp spots (crawlspaces, exterior edges, around plumbing), steel wool can degrade, compress, and open a gap again.
- Pull-out: Rodents can sometimes tug it loose if it’s not anchored with sealant or a mechanical fastener.
- Mess factor: Fragments can snag, break off, and create cleanup headaches in tight spaces.
Real-world tip
If you do use steel wool, pair it with a quality exterior-rated sealant to lock it in. For kitchens and pantries, focus on sealing the underside of cabinets where plumbing penetrates—the “invisible” holes are often the ones that matter most.
Option #3: Copper mesh (a favorite for a reason)
Best for
- Utility line penetrations (internet/cable, AC line sets, hose bibs)
- Weird-shaped gaps that need to be packed tightly
- Moist or coastal environments where steel rusts faster
Where it fails
- Not structural on its own: If a gap has movement or vibration (garage door framing, HVAC line chase), mesh can loosen over time without a cap or sealant.
- Large openings: If you’re trying to fill a huge void, mesh alone becomes expensive and can sag.
Real-world tip
Pack copper mesh tightly (think “dense, springy wad,” not a loose ball). Then finish with a weatherproof sealant or a trim plate. This combo is especially handy around modern exterior cladding where you want a clean finish without obvious hardware.
Option #4: Hardware cloth (the “serious” fix for vents and bigger gaps)
Best for
- Foundation vents and crawlspace vents
- Attic intake vents (paired with proper airflow considerations)
- Covering larger holes where packing material would be unreliable
Where it fails
- Poor fastening: Staples alone may loosen outdoors. Screws + washers usually hold better.
- Wrong mesh size: Go too large and you’re basically installing a rodent doorway.
- Airflow mistakes: Over-blocking ventilation can cause moisture issues.
Real-world tip
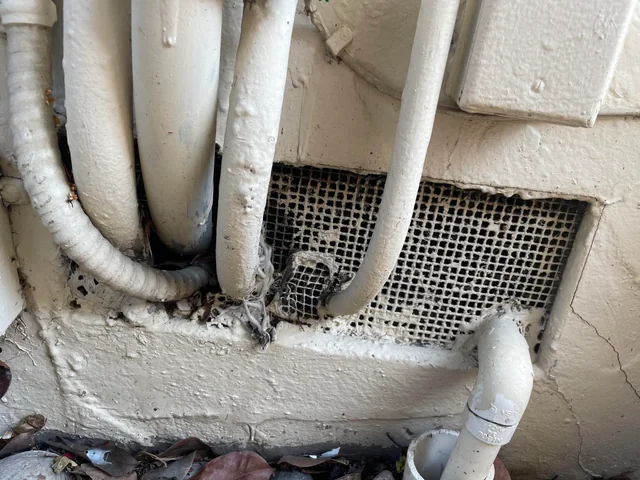
When you install hardware cloth over a vent, leave it flat and tensioned. If you create a “bubble,” rodents can climb and pry. Use corrosion-resistant fasteners. And don’t ignore ventilation needs—your goal is to block pests, not trap moisture.
Option #5: Metal flashing or sheet metal patches (the long-haul approach)
Best for
- Gnawed openings at siding corners, garage edges, and lower wall transitions
- Areas with recurring chew attempts (pet food storage rooms, trash areas)
- Creating a hard “kick plate” where rodents keep testing
Where it fails
- Bad cuts and sharp edges: Poorly finished metal can be hazardous during installation and later maintenance.
- Water management: Installed incorrectly, flashing can redirect water behind siding.
- Aesthetics: If you don’t plan it, metal patches can look like… patches.
Real-world tip
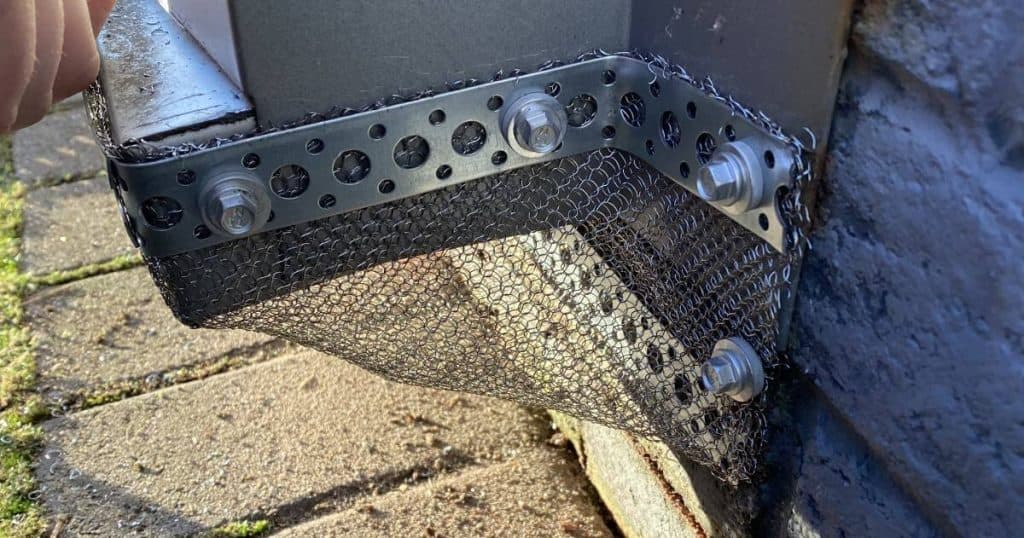
If you have a garage where rodents repeatedly chew at the lower corners, consider a clean metal corner guard or flashing strip that runs up 12–18 inches. Combine it with door threshold repair and tight weatherstripping for a one-and-done upgrade.
Which option should you use? A simple comparison by scenario
Instead of picking one material for everything, match the material to the location:
- Small interior gaps (dry): copper mesh + sealant (or steel wool + sealant as a temporary fix)
- Exterior utility penetrations: copper mesh packed tight + exterior-rated sealant; add a trim plate if the hole is sloppy
- Vents and openings you can’t “stuff”: hardware cloth with screws + washers
- Recurring chew zones: sheet metal/flashing as the outer armor, optionally backed with foam for air sealing
- Big irregular cavities: create a physical barrier first (mesh/metal), then foam to stop drafts
Two overlooked factors: food access and outdoor pressure
Even perfect sealing struggles if you’re basically running a rodent buffet. Keep outdoor trash sealed, pick up fallen fruit, and store bird seed and pet food in lidded metal containers. Also, trim vegetation away from the house—branches and dense shrubs act like ladders and hiding places.
In many regions, rodent pressure can spike when weather changes, construction disrupts habitats, or local conditions affect food availability. If you like tracking broader environmental and regional factors, scanning a reputable news wire like Reuters coverage on climate and local disruptions can provide context on why pest activity sometimes surges unexpectedly.
A practical weekend plan (with measurable checkpoints)
Day 1: Inspect and prioritize
- Mark openings with painter’s tape so you don’t forget them.
- Prioritize anything with droppings, rub marks (greasy streaks), or visible gnawing.
- Note moisture-prone areas (downspouts, hose bibs, crawlspace edges) where rust-prone materials won’t last.
Day 2: Seal using “barrier first, seal second”
- For holes around pipes: pack copper mesh, then seal.
- For vents: attach hardware cloth with screws + washers.
- For chewed edges: cover with metal flashing, then seal the seams.
Checkpoint: verify with a low-tech test
- At dusk, turn on interior lights and walk outside: look for light leaking through gaps (a surprisingly effective indicator).
- On a windy day, feel for drafts near baseboards and under sinks.
- Use a flashlight in the garage corners and along sill plates for tiny “mouse highways.”
Conclusion: the best rodent-proofing material is usually a combo
If you take one thing from this comparison, make it this: rodents exploit weak materials and sloppy transitions. Foam alone is rarely enough. Steel wool is convenient but can degrade. Copper mesh is versatile and durable when properly locked in. Hardware cloth is ideal for vents and larger spans. Metal flashing is the best long-term “armor” for repeat problem areas.
A modern home has modern entry points—cables, conduits, rooftop lines, hidden vent paths—so a one-material approach almost always leaves gaps (literally). Use barrier materials where chewing is likely, use sealants to lock everything in, and you’ll get a fix that lasts longer than a season.
9 “Hidden Leak” Maintenance Checks That Protect Your Property (and Help Keep Rodents Out)
Why “Hidden Leaks” Are the Most Overlooked Property Maintenance Trend
One of the most practical (and quietly trending) ideas in property maintenance is focusing on hidden leaks—the slow, easy-to-miss moisture problems that don’t show up as obvious drips. These issues drive up bills, damage materials, trigger mold, and create the exact conditions rodents love: water access, softened building materials, and new entry gaps.
Rodents only need a small opening to exploit—often along pipes, under cabinets, or at service penetrations. Moisture makes it easier for them to widen weak points and encourages insects (a food source) and nesting materials to build up. The good news: a handful of targeted checks can reduce maintenance costs while supporting a solid rodent-proofing strategy.
Below are nine specific, non-generic checks you can do on a schedule. Each one includes actionable steps and real-world cues to watch for.
9 Hidden-Leak Maintenance Checks (Numbered List)
1) Dye-Test Your Toilets to Catch Silent Flapper Leaks
A toilet can leak from the tank into the bowl without making noise. That’s water waste, but it also adds constant humidity to bathrooms—especially in smaller en-suites and powder rooms where ventilation is limited.
- How to test: Add a few drops of food coloring to the tank. Wait 10–15 minutes without flushing. If color appears in the bowl, your flapper is leaking.
- Actionable fix: Replace the flapper (usually a low-cost part) and clean the valve seat to remove mineral buildup.
- Rodent-proofing bonus: Lower humidity reduces condensation on pipes and surfaces—common “watering stations” rodents exploit.
2) Inspect Under-Sink “Micro-Leaks” With Paper Towels and a Flashlight
Under-sink cabinets hide tiny drips at compression fittings, angle stops, and trap joints. These micro-leaks can go unnoticed until the cabinet base warps or turns soft.
- How to test: Wrap dry paper towel around each connection (especially where the supply line meets the shutoff valve). Leave it for 5 minutes; even a tiny leak will show a wet patch.
- What to look for: Swollen particleboard, a sour smell, or dark rings around pipe penetrations.
- Rodent-proofing bonus: Soft, damaged cabinet floors are easier for pests to chew and expand; sealing penetrations is far more effective on solid, dry substrates.
3) Check Your Water Meter for “All-Off” Flow (A Simple, High-Value Test)
This is a powerful whole-property check that can reveal leaks you can’t see—like a pinhole in a pipe, a slab leak, or a stuck irrigation valve.
- How to test: Turn off all water-using fixtures and appliances. Note the meter reading (or the small triangle/dial that indicates flow). Wait 15–30 minutes. If it moves, water is flowing somewhere.
- Next step: Isolate by closing the main shutoff and checking again; if movement stops, the leak is inside the property plumbing. If it continues, it may be between meter and main shutoff.
- Pro tip: Do this after guests leave or after maintenance work—leaks often start after a valve gets bumped or a fitting is overtightened.
4) Treat Pipe Penetrations as “Moisture + Entry” Hotspots (Seal the Right Way)
Pipes entering walls and floors often have a visible gap. That gap can channel humidity, allow drafts, and serve as a direct rodent highway—especially in kitchens, laundry rooms, and basements.
- What to do: Use a proper seal strategy: pack larger voids with rodent-resistant material (like copper mesh or stainless-steel wool), then finish with an appropriate sealant.
- Avoid: Expanding foam as the only barrier—many rodents can chew through it. Foam can still be useful as a secondary air seal when paired with chew-resistant packing.
- Moisture angle: Sealed penetrations reduce moist air migration, which can cut condensation in wall cavities.
5) “Rain-After” Gutter and Downspout Audits (The Timing Matters)
Checking gutters on a sunny day can miss the real problem: overflow during heavy rain. The most useful inspection happens right after a downpour.
- What to look for: Water cascading behind gutters, splash marks on siding, or pooled water at the foundation line.
- Actionable fix: Clean debris, confirm proper slope, extend downspouts at least 4–6 feet away (local rules and site conditions vary), and add splash blocks where needed.
- Rodent-proofing bonus: Chronic wet soil near the foundation can encourage burrowing and increase the chance of entry through weak points at sill plates and vents.
6) HVAC Condensate Line Maintenance (The Clog That Mimics a Roof Leak)
A partially clogged condensate drain can back up and create water damage near air handlers—often mistaken for a roof or plumbing leak.
- Signs: Musty smell near the unit, water staining, or intermittent dripping during heavy cooling cycles.
- Maintenance: Flush the condensate line (method depends on system design). Replace clogged float switches or clean the drain pan if accessible.
- Rodent-proofing bonus: Mechanical rooms with standing water invite pests. If rodents find a reliable water source there, they often explore nearby duct chases and wall voids.
7) Door Threshold “Light Test” to Stop Wind-Driven Rain and Pest Gaps
Here’s a simple, specific check: stand inside at night, turn off interior lights, and look for daylight (or streetlight) around exterior doors. If light gets in, water and pests often can too.
- What to fix: Worn door sweeps, compressed weatherstripping, misaligned strike plates that prevent tight closure, and degraded thresholds.
- Why it matters: Wind-driven rain can wick under doors, soaking subfloors and baseboards over time—damage that’s expensive and slow to reveal.
- Rodent-proofing bonus: Small gaps at the bottom corners of doors are common entry points, especially into garages and utility rooms.
8) Appliance Pull-Out Routine: Refrigerator, Dishwasher, and Washing Machine
Appliance leaks are “high impact, low visibility.” A slow seep behind a dishwasher or washing machine can damage flooring and create a damp cavity that’s attractive to pests.
- Frequency: Every 6 months for owner-occupied properties; more often in rentals or high-turnover units.
- What to check: Supply hoses (bulges/cracks), clamps, shutoff valves, and drip pans. Look for mineral deposits (chalky white), rust, or warped flooring edges.
- Upgrade tip: Consider braided stainless-steel hoses and add a water-leak alarm behind the appliance for early warning.
9) “Basement Edge Walk” After Storms: Find Seepage Before It Becomes Structural
Basement and crawlspace seepage often starts as a thin damp line at the perimeter—easy to miss if you only look at the center of the room.
- How to do it: Walk the entire perimeter with a flashlight and check base of walls, corners, and around utility penetrations.
- What to document: Damp spots, efflorescence (white powdery deposits), peeling paint, or a persistent earthy smell.
- Actionable next steps: Improve grading, extend downspouts, and address cracks appropriately. For recurring water, consult a waterproofing professional.
Real-World Context: Why Moisture Control Is Also Pest Control
Moisture management isn’t just about comfort—it’s a property protection multiplier. In many buildings, the same pathways that let water in (gaps, cracks, penetrations, failing seals) also become pest pathways. Rodents are opportunists: if the structure offers water access and easy entry, they’ll keep returning.
If you want a deeper look at how extreme weather and heavy rainfall events can affect homes and infrastructure—often increasing the likelihood of water intrusion—resources like BBC coverage on flooding and extreme weather can provide useful background and examples from recent events.
Conclusion: A Practical Schedule That Pays Back
Hidden leaks rarely announce themselves. They quietly raise water bills, rot wood, warp floors, and create the damp, sheltered conditions that rodents thrive in. The nine checks above are designed to be repeatable and realistic—things you can do with minimal tools and a bit of consistency.
If you’re building a rodent-proofing plan, start here: keep the building dry, seal the service penetrations properly, and treat every slow drip as a potential entry-point creator. Do these checks seasonally (and after major storms), and you’ll protect your property’s structure, indoor air quality, and long-term maintenance budget.

Rodent-Proof Smart Homes: 11 Practical Ways to Stop Mice & Rats From Exploiting Modern Tech
Smart Homes, Smarter Rodents: Why This Topic Matters
Smart thermostats, EV chargers, solar inverters, mesh Wi‑Fi, and battery backups have made our homes more efficient—and accidentally introduced new pathways, heat sources, and “quiet zones” that mice and rats love. Rodents don’t care that a cabinet is “high-tech.” They care about warmth, shelter, nesting material, and predictable food or water. The result is a modern pest-control challenge that’s a little different from the usual “seal the basement window” advice.
This roundup gathers practical, field-tested tips and resources for rodent-proofing a smart home—especially where low-voltage wiring, exterior penetrations, and warm electronics create hidden vulnerabilities. If you’ve ever had an internet outage with no obvious cause, a mysteriously tripped breaker, or droppings near a utility closet, these strategies can help.
Roundup: 11 Ways Rodents Target Smart Homes—and How to Stop Them
1) Audit the “Cable Highway” Around Your House
Smart homes tend to have more cables than traditional homes: ISP lines, security camera wiring, landscape lighting, Ethernet runs, and irrigation controllers. Every cable that enters the building is also a potential rodent entry point.
- Actionable check: Walk the home’s exterior and trace every wire to where it enters. Look for gaps bigger than a pencil (about 1/4 inch); mice can slip through surprisingly small spaces.
- What to do: Seal around cable penetrations with a combination approach: tight-fitting escutcheon or grommet + rodent-resistant filler (copper mesh or stainless steel wool) + exterior-grade sealant. Avoid relying on spray foam alone; rodents can chew it.
- Real-world example: Homeowners often discover mouse activity behind a TV wall mount or smart hub cabinet because the “low-voltage box” behind the drywall was never sealed after installation.
2) Treat Solar, EV, and Battery Systems as “Rodent Infrastructure”
Solar arrays, EV chargers, and home battery systems are increasingly common—and rodents are attracted to the warmth of inverters and the shelter created by conduit runs.
- Where rodents hide: Under exterior conduits, behind inverter backplates, inside garage walls where charger conduit enters, and near crawlspace or attic penetrations tied to these installs.
- What to do: Add conduit collars, seal wall penetrations with metal mesh + sealant, and keep vegetation trimmed away from equipment. For rooftop solar, ask your installer about critter guards (wire mesh barriers) around panel edges.
- Data point: Insurance and service technicians frequently note wiring damage as a major cost driver in rodent incidents—especially when chew damage disables multiple systems at once.
3) Upgrade “Smart” Garage Door and Utility Room Defenses
Garages are rodent gateways: they offer shelter, stored food (pet food, bird seed), and plenty of hiding spots behind tool cabinets. Smart garage door systems don’t change the fundamentals: if the door doesn’t seal tightly, rodents get in.
- Quick test: At night, close the garage door and look for light leaking along the sides and bottom.
- Fixes that work: Replace the bottom seal and add rodent-resistant door sweeps. Install brush seals or vinyl weatherstripping on the jambs. Keep the gap under side doors to less than 1/4 inch using a heavy-duty sweep.
- Pro tip: If you store pet food, transfer it to hard plastic or metal bins with locking lids. Rodents can chew through bags and thin plastic.
4) Don’t Let “Always-On Warmth” Become a Nesting Invitation
Rodents gravitate toward steady heat: network switches, DVRs, servers in a closet, aquarium equipment, water heater closets, and laundry rooms. These areas can quietly become nesting sites.
- What to do: Keep utility closets tidy and avoid storing soft goods (paper towels, fabric, insulation scraps) on the floor. Use a lidded plastic tote for spare cables and accessories.
- Early warning sign: Shredded paper, insulation tufts, or cloth fibers near a warm device shelf.
- Control measure: Place snap traps in protected trap stations along walls (not in the middle of the room), especially behind equipment racks where droppings appear.
5) Build a “Rodent-Safe Network Closet” (Yes, It’s a Thing)
If you have a dedicated network panel or structured media cabinet, treat it like a mini mechanical room.
- Seal wall voids: Any knockouts leading into stud bays should be sealed with metal mesh and a fire-rated sealant when required by code.
- Use cable management: Keep cables elevated and bundled—rodents prefer hidden runs and cluttered corners.
- Consider airflow: Overheating can lead homeowners to leave cabinet doors ajar, creating a cozy cavity. Add ventilation solutions instead of leaving openings that invite pests.
6) Make Your Smart Garden Less Rodent-Friendly
Smart irrigation and landscape lighting can inadvertently support rodent activity by creating predictable watering zones and dense plant cover.
- Adjust irrigation: Fix leaks and avoid constant dampness near foundations. Rodents may nest close to reliable water sources.
- Trim back cover: Keep shrubs and groundcover at least 12–18 inches away from exterior walls to reduce hiding spots.
- Secure compost and bird seed: Use rodent-resistant bins and avoid leaving seed spills. If you feed birds, consider a catch tray and clean up routinely.
7) Use Motion Alerts Strategically (Not Just for Package Theft)
Your smart cameras can help with rodent detection—if you aim them at the right places and configure them for small, low-to-the-ground movement.
- Best camera targets: Garage corners, side-yard fence lines, trash bin areas, under-deck access points, and around exterior penetrations (AC line set, cable entries).
- Settings tip: If your system allows it, create a “zone” near the ground and increase sensitivity only in that strip to reduce false alerts from tree movement.
- Reality check: Cameras don’t replace exclusion and trapping, but they can reveal travel routes so you place traps where they matter.
8) Manage Trash Like a Pro (Because Rodents Do)
Smart homes often mean more deliveries and more packaging. Overflowing bins or loosely bagged trash can sustain rodent populations even when the house itself is sealed.
- Best practice: Use bins with tight-fitting lids; rinse food containers before tossing; don’t leave bags outside the bin.
- Placement: Keep bins off the wall by a few inches so rodents have less cover and you can spot droppings or gnaw marks.
- Data point: A single pair of rodents can multiply quickly under favorable conditions—food access is the accelerant.
9) Choose Rodent-Resistant Materials for Renovations and Retrofits
When adding smart-home upgrades (wiring, new outlets, wall-mounted tablets), you often open walls or drill new penetrations. That’s the ideal time to rodent-proof permanently.
- Materials that help: Metal flashing, copper mesh, stainless steel wool, cement patch, and properly installed door sweeps.
- Materials to avoid relying on: Plastic mesh, thin vinyl patches, and foam-only solutions.
- Pro insight: Rodents often re-enter through the last place a contractor “temporarily” patched and forgot to finish.
10) Know What You’re Dealing With (Species Clues Change the Plan)
Different rodents behave differently. Roof rats tend to travel high (attics, rafters, trees), while Norway rats typically stay lower (crawlspaces, basements). Mice can exploit tiny gaps and may nest inside cabinets or appliances.
- Clue-based ID: Dropping size and location matter; so do rub marks, gnaw patterns, and where you hear activity (attic vs. underfloor).
- Helpful resource: For broader wildlife context and behavior insights, you can explore species background and reporting from National Geographic’s wildlife coverage, which can help homeowners understand why animals choose certain habitats.
- Why it matters: If activity is in the attic and you have overhanging branches, trimming tree limbs and screening roofline gaps may be more effective than focusing only on the foundation.
11) Pair Exclusion With Monitoring: A Simple “Smart” Rodent Plan
Rodent control isn’t just about reacting—it’s about preventing re-entry and spotting early signs before a small problem becomes expensive damage.
- Step 1: Exclusion first. Seal entry points before heavy trapping whenever possible; otherwise, new rodents can replace the ones you remove.
- Step 2: Place traps where rodents travel. Along walls, behind appliances, near utility penetrations, and in garages—never scattered randomly in open areas.
- Step 3: Track results. Check traps daily at first, then weekly as activity drops. Use a simple note on your phone: date, location, result.
- Step 4: Maintain quarterly. Re-check seals, weatherstripping, and exterior penetrations as seasons change (expansion/contraction can reopen gaps).
Common Smart-Home “Rodent Mysteries” and What They Usually Mean
Internet keeps cutting out
Often linked to chewed coax/fiber at the exterior entry point, inside a wall cavity, or in the attic where the line crosses rafters. Inspect the full run, not just the modem.
Random sensor failures (door/window, garage, leak sensors)
May indicate rodents nesting near the sensor or in the same cavity—especially if you find shredded material or droppings nearby. Address nesting sites and seal access.
Unexplained odors near a tech closet
Can signal urine saturation, nesting, or a hidden carcass after trapping. If odor persists, locate the source and sanitize properly; consider professional help for deep contamination.
Conclusion: Make the “Smart” Part Work for You
Rodents exploit what’s predictable: stable heat, hidden voids, easy food, and unsealed pathways created by modern wiring and equipment. The best results come from combining old-school exclusion (metal + sealant + tight doors) with smart-home visibility (motion zones, strategic monitoring, and routine maintenance reminders).
If you focus your effort on the cable entry points, garages, utility zones, and outdoor clutter that supports rodent activity, you can keep your connected home running smoothly—and far less appetizing to unwanted guests.

9 Rodent-Proofing Upgrades Homeowners Overlook (But Pros Use to Stop Mice Fast)
9 Rodent-Proofing Upgrades Homeowners Overlook (But Pros Use to Stop Mice Fast)
When people think “rodent proofing,” they often jump straight to traps and bait. But the most effective home service strategy is exclusion: upgrading weak points so rodents can’t get inside in the first place. Mice can squeeze through openings about the size of a dime (roughly 1/4 inch), and rats can exploit gaps closer to 1/2 inch—meaning tiny construction details can become a major entry route.
Below are nine specific, contractor-grade rodent-proofing upgrades that go beyond the usual “seal cracks” advice. Each item includes what to look for, why it matters, and actionable tips you can implement or request from a pro.
1) Add a “Kick-Out” Flashing at Roof-to-Wall Intersections
What it is: A small piece of angled flashing installed where a roofline meets a vertical wall (often near gutters). It “kicks out” rainwater into the gutter instead of allowing it to run behind siding.
Why it stops rodents: Chronic moisture behind siding leads to rot and soft wood—perfect for rodents to widen gaps and create entry points. Rodent problems often begin as water-management problems.
Actionable upgrade:
- Inspect roof-to-wall areas for staining, peeling paint, or warped siding.
- Ask a roofer or handyman to install code-compliant kick-out flashing and reseal the step flashing line.
- After installation, confirm water from that roof section lands cleanly into the gutter (not behind it).
Real-world example: In many two-story homes with an attached garage, the short roof section over the garage dumps water into a sidewall corner. That corner becomes a repeat moisture zone, and within a few seasons it can turn into a soft, chewable entry point.
2) Upgrade Garage Door Weatherstripping to a Rodent-Resistant Bottom Seal
What it is: A reinforced bottom seal (often with an aluminum retainer) and tight perimeter weatherstripping designed to eliminate light gaps and resist gnawing.
Why it stops rodents: Garages are common “first-stop” entry spaces—warmer than outside, full of hiding places, and frequently left open. A 1/4-inch gap at the corners or a warped bottom seal is enough for a mouse.
Actionable upgrade:
- At night, close the garage door and look for daylight at corners and along the bottom.
- Replace brittle vinyl seals with a rodent-resistant design (often rubber with a retainer).
- For uneven slabs, ask about a threshold seal adhered to the concrete to create a continuous barrier.
Pro tip: If you store birdseed or pet food in the garage, place it in sealed metal bins—this reduces attraction while you tighten up the entry points.
3) Install 1/4-Inch Hardware Cloth Behind Foundation Vents (Not Window Screen)
What it is: Galvanized 1/4-inch hardware cloth cut and fastened behind vents and crawl space openings.
Why it stops rodents: Standard insect screen tears easily and can be chewed. Hardware cloth provides true physical exclusion while allowing airflow. The 1/4-inch size blocks mice and many other small intruders while still venting.
Actionable upgrade:
- Check every foundation vent: if you see flimsy screen, rust, or gaps at edges, plan an upgrade.
- Fasten hardware cloth with corrosion-resistant screws and washers (staples alone often fail).
- Seal the perimeter with exterior-grade sealant where appropriate, without blocking airflow.
Data point to remember: Small openings multiply quickly. Ten vents with minor gaps can become ten easy access points, especially in older homes with shifting foundations.
4) Convert Exposed Pipe Penetrations to “Collared” Seals (Escutcheon + Rodent-Proof Backing)
What it is: A rigid collar/escutcheon plate around pipes plus rodent-resistant backing (like copper mesh or mortar) to eliminate the “donut gap” where pipes pass through walls.
Why it stops rodents: Plumbing and HVAC penetrations are highways from exterior to interior cavities. Spray foam alone is not enough; rodents can chew through it.
Actionable upgrade:
- Inspect where AC lines, hose bibs, gas lines, and drains enter the home.
- Fill voids with copper mesh or a cementitious patch, then finish with a collar for durability and a clean look.
- In garages and basements, check interior penetrations too—rodents may enter the wall cavity elsewhere and emerge near pipes.
5) Replace Dryer Vent Covers With Pest-Proof (But Lint-Safe) Termination Hoods
What it is: A vent termination designed to close when the dryer is off, reducing entry, while still allowing proper airflow and lint expulsion.
Why it stops rodents: Warm, humid air is attractive, and vents are a ready-made opening. Some covers break, stick open, or have wide slats that invite nesting.
Actionable upgrade:
- Check the exterior hood: if it doesn’t close fully, it’s a risk.
- Choose a high-quality hood intended for dryers (avoid fine screens that trap lint and create fire risk).
- Clean the entire dryer duct at least annually; heavy lint buildup reduces flap closure and increases hazards.
Safety note: Pest-proofing should never compromise dryer safety. When in doubt, use a licensed HVAC or vent-cleaning service for selection and installation.
6) “Cap and Cage” Chimneys and Fresh-Air Intakes the Right Way
What it is: A properly fitted chimney cap and robust guards for fresh-air intakes that maintain appliance performance.
Why it stops rodents: Roofline openings are out of sight, but rodents are excellent climbers. Chimneys, furnace intakes, and attic vents are common access points.
Actionable upgrade:
- Have a chimney professional install a cap sized for your flue and local weather conditions.
- For high-efficiency furnace intakes/exhausts, use manufacturer-approved guards to prevent obstruction.
- Inspect after storms—bent caps and loose guards create sudden entry points.
Proof it’s not just theory: Wildlife and pest incidents often spike after severe weather because displaced animals and damaged exterior components create new opportunities. Staying ahead with durable caps and guards reduces emergency calls later.
7) Seal Siding “J-Channels” and Corner Posts With Backer Rod + Quality Sealant
What it is: Backer rod is a foam rope used to fill larger gaps before sealing; combined with a high-quality exterior sealant, it creates a long-lasting flexible barrier.
Why it stops rodents: Vinyl siding assemblies include channels and trim pieces that can hide voids. Rodents exploit these sheltered pathways, entering at corners or behind loose trim and traveling upward into soffits and attics.
Actionable upgrade:
- Look for loose corner posts, gaps at trim ends, and areas where siding meets masonry or utility boxes.
- Use backer rod where gaps are too large for sealant alone; then apply an exterior sealant rated for UV and temperature swings.
- Prioritize the “stack effect” zones: lower corners and areas near decks/porches where rodents can climb and hide.
8) Reinforce Shed-to-Home Connections (Deck Ledger, Breezeways, and Add-Ons)
What it is: Rodent-proofing the transition zones where structures meet—decks, breezeways, sunrooms, and attached sheds—using proper flashing, tight trim, and sealed junctions.
Why it stops rodents: Add-ons often have imperfect seams, and these sheltered junctions are protected from rain and sun, letting gaps persist for years. Rodents love these “covered runways.”
Actionable upgrade:
- Inspect the deck ledger area for gaps where the deck meets the house; look underneath with a flashlight.
- Install or repair flashing that directs water out and away—reducing rot and future openings.
- Close off hidden cavities with rigid barriers (wood, metal flashing, or mortar) instead of foam-only fixes.
Real-world example: Attached sheds frequently become a nesting area, then rodents move into wall cavities through shared framing. Sealing the connection points can prevent the “two-structure” problem.
9) Build a “No-Harbor” Perimeter Zone (Gravel Strip + Trim Rules + Storage Discipline)
What it is: A maintenance system that reduces cover and food near the home: a narrow gravel strip around the foundation, vegetation control, and smarter storage.
Why it stops rodents: Even well-sealed homes get pressured by nearby harborage. Reduce hiding spots and you reduce the number of rodent “attempts” against your exclusion work.
Actionable upgrade:
- Create a 12–18 inch gravel border along the foundation where feasible (it discourages burrowing and reduces moisture against siding).
- Keep mulch and soil at least several inches below siding; never let mulch touch wood trim.
- Trim shrubs so they don’t touch the house; keep branches off the roof to reduce access routes.
- Store firewood at least 18 inches off the ground and several feet away from the home.
Helpful reference: For broader context on urban pest pressures and why prevention is increasingly important, see coverage and reporting at The New York Times.
Conclusion: Rodent Proofing Works Best as a Targeted Upgrade Plan
Effective rodent control in home services isn’t about doing one big thing—it’s about eliminating the specific weak points rodents exploit: water-damaged corners, sloppy penetrations, vent openings, and sheltered transitions. If you want the best results, start with an exterior inspection (top to bottom), prioritize repairs that solve both moisture and gaps, and use durable materials that rodents can’t chew through.
If you’re not sure where to begin, a professional rodent-proofing assessment can map entry points, recommend the highest-impact upgrades, and help you avoid “quick fixes” that fail in the first season. Done correctly, exclusion pays back in fewer infestations, less property damage, and a healthier home.

9 Smart Home Maintenance Habits That Quietly Cut Rodent Risk (Without Traps or Poisons)
Rodent-proofing isn’t a single project—it’s a set of habits
Many homeowners only think about mice or rats after hearing scratching in the wall or finding droppings. But the most reliable way to reduce rodent problems is to build small, repeatable maintenance habits into your normal household routine. These habits don’t rely on traps or poisons; instead, they remove the conditions that attract rodents and block the entry routes they use most.
Below are nine practical, non-obvious habits you can implement year-round. Each habit includes real-world examples and specific steps, so you can turn “rodent-proofing” into something you actually do—not just something you plan to do.
1) Do a “light-at-night” exterior gap audit twice a year
Rodents can compress their bodies to fit through surprisingly small openings (mice can enter through gaps about the size of a dime). A fast way to find these openings is to make the house work for you: use light contrast.
How to do it:
- At dusk, turn on basement/crawlspace lights and as many interior lights as possible.
- Walk the exterior perimeter slowly and look for any light leaking out at the sill plate, foundation line, utility penetrations, or behind siding.
- Mark leaks with painter’s tape or a note on your phone so you can seal them in daylight.
Real-world example: Homeowners often miss gaps behind spigots, AC line sets, and cable penetrations because they’re visually cluttered. Light makes those voids obvious—even from several feet away.
2) Replace “pretty” weatherstripping with commercial-grade door sweeps
Doors are one of the most common rodent entry points—especially garage side doors, older back doors, and doors with worn thresholds. Decorative foam strips frequently fail because they compress permanently or peel away.
Actionable upgrade:
- Install a heavy-duty door sweep with a reinforced rubber blade (not brush-only) and verify it contacts the threshold along the entire width.
- Check the hinge side and latch side for daylight; adjust the strike plate or hinges if needed.
- For garage doors, use a rodent-resistant bottom seal and replace side weatherstripping if it has hardened or curled.
Field note: If you can slide a pencil under a door at any point, a mouse can often exploit that gap—especially in colder months when they’re motivated to get inside.
3) Treat your garage like a pantry, not a storage unit
Garages are rodent magnets because they combine shelter, clutter, and food smells (pet food, bird seed, grass seed, and even cardboard). Rodents don’t just eat food—many also gnaw packaging to nest in it.
Habit to adopt: Convert “open-bag storage” to “sealed-bin storage.”
- Move pet food, bird seed, and bulk grains into thick, lidded bins (metal is best; heavy-duty plastic can work if it locks tightly).
- Store bags off the floor on shelving at least 6 inches above ground.
- Break down cardboard weekly; replace long-term cardboard storage with clear totes (cardboard is both nesting material and cover).
Practical example: A single 20–40 lb bag of bird seed that spills a handful each week can become a long-term food source that sustains a hidden mouse population behind stacked boxes.
4) Fix “micro-leaks” before they become rodent watering stations
Rodents need water. In many homes, the biggest attractor isn’t visible standing water—it’s the slow drip under a sink, condensation at an HVAC line, or a damp basement corner.
Quick inspection routine (monthly, 10 minutes):
- Run a dry paper towel around P-traps and shutoff valves under sinks; any moisture indicates a leak worth addressing.
- Check the water heater pan, washing machine hoses, and refrigerator water line for dampness.
- Ensure condensate lines drain properly; clear blockages so water doesn’t pool.
Why it matters: A consistent drip can sustain rodents even if you keep food sealed. Remove the water, and you make the environment far less livable.
5) Adopt “one-bag-out” trash discipline and upgrade the can itself
Trash is more than smell—it’s calories. Thin bags left in open bins, especially overnight, can feed rodents and teach them your home is a reliable stop.
Better system:
- Use a lidded outdoor can with a tight, locking or latch-style lid.
- Rinse food containers that will sit for more than a day (especially meat trays and oily packaging).
- Take out kitchen trash nightly if it contains food scraps—even if it isn’t full.
Data-backed context: Waste management and sanitation regularly show up in coverage of urban pest pressures and municipal cleanliness. For broader reporting on sanitation, infrastructure, and public health factors that influence pest environments, consult reputable news sources such as Reuters coverage of public health and infrastructure.
6) Prune “rodent ladders” and widen your vegetation buffer
Dense landscaping gives rodents cover, safe travel corridors, and easy climbing routes onto roofs. Ivy, overgrown shrubs, and tree branches that touch the house are common “highways.”
Clearance targets that work in practice:
- Keep shrubs trimmed so there’s a visible gap between foliage and siding (aim for 12–18 inches).
- Trim tree branches at least 3 feet away from the roofline to reduce roof access.
- Remove groundcover that touches the foundation, or maintain a gravel strip along the perimeter.
Real-world example: Roof rats in warmer regions frequently use tree limbs as bridges. When homeowners cut back one overhanging branch, nighttime attic activity often drops dramatically because the easiest route disappears.
7) Rodent-proof your vents and weep holes the right way (don’t “seal everything”)
A common mistake is sealing openings that are meant to breathe—like weep holes, attic vents, and crawlspace ventilation. Improper sealing can trap moisture and cause rot, mold, or structural issues.
Safer approach:
- Install corrosion-resistant, 1/4-inch hardware cloth behind vent covers (1/4-inch is small enough to block mice).
- Use pest-rated vent covers for dryer vents and bath exhaust exits that prevent entry while allowing airflow.
- Keep weep holes functional, but ensure nearby gaps (cracked mortar, missing caulk, broken screens) are repaired so weep holes aren’t “adjacent access points.”
Tip: Avoid plastic mesh in exterior areas—it degrades in sun and is easier to chew through.
8) Use “sentinel items” to detect early activity before it becomes an infestation
Rodent problems are easiest to solve when they’re small. Instead of waiting for noise or odor, set up a simple early-warning system.
Two low-effort sentinel tactics:
- Flour tracking: Lightly dust a thin line of flour along garage walls behind stored items for a night or two. Tracks confirm movement paths without needing cameras.
- Talc or chalk checks: In attics or crawlspaces, a small patch near suspected entry points can reveal footprints and tail drags.
What to do if you find tracks: Don’t just trap. First, identify and seal the nearby access point and remove attractants; otherwise, you’ll catch one and invite the next.
9) Schedule a “materials upgrade” day: swap chewable fillers for rodent-resistant solutions
Many DIY sealing materials fail because rodents can chew through them or because they crack with temperature swings. A once-a-year upgrade day—focused on the most vulnerable spots—pays off long-term.
Upgrade priorities:
- Utility penetrations: Replace crumbling foam with a combination of metal flashing or escutcheon plates and high-quality exterior sealant.
- Small gaps: Use stainless steel wool or copper mesh as a backing, then seal over it with appropriate caulk (the mesh discourages chewing).
- Damaged screens: Replace with metal screen where possible, especially around crawlspace vents.
Real-world example: Expanding foam alone often becomes a “chew toy.” Pairing mesh + sealant makes the barrier far more resilient and reduces callbacks for repeat entry.
Conclusion: Small habits create a home rodents can’t use
Rodent-proofing works best when it’s preventive, routine, and focused on fundamentals: block entry, remove food, reduce water, and eliminate hiding spots. The nine habits above are designed to fit into normal home maintenance—seasonal audits, quick monthly checks, and a yearly upgrade day. If you implement even a few consistently, you’ll dramatically reduce the odds of rodents moving in—and you’ll catch early signs long before a minor issue becomes a costly infestation.
If you want to go further, document what you do: keep a simple checklist by season (spring/fall perimeter audit, monthly leak check, weekly garage tidying). Consistency is the real “secret weapon” in rodent-proofing.
Smart Home Rodent Proofing: FAQ Guide to Sealing, Sensors, and Maintenance Without DIY Mistakes
What is “smart” rodent proofing, and why is it trending in property maintenance?
“Smart” rodent proofing blends traditional exclusion (blocking entry points) with modern monitoring and maintenance routines—think moisture control, sensor alerts, and data-driven inspections. It’s trending because property owners want fewer surprise infestations, reduced repair costs, and a more proactive approach than simply setting traps after noises start.
Rodents can enter through gaps as small as 6–12 mm (about the size of a pencil or small coin edge, depending on species). The smart angle is not just sealing gaps, but also identifying the conditions that invite rodents: warmth, food access, cluttered storage, and hidden water sources. A smart plan prioritizes the highest-risk points and verifies results with monitoring rather than guesswork.
Why are rodents a property maintenance problem, not just a pest-control issue?
Rodents are directly tied to building performance. Their activity can trigger costly maintenance problems that persist even after the rodents are removed:
- Electrical damage: Chewed insulation increases fire risk and causes intermittent faults that are difficult to diagnose.
- Plumbing and HVAC impacts: Nesting near boilers, ducting, or insulation can reduce efficiency and create odours.
- Moisture and mould: Rodents often exploit damp voids; their presence can signal leaks or condensation issues.
- Structural deterioration: Gnawing, burrowing, and soiling can degrade timber, plaster, and stored materials.
In other words, robust rodent proofing is preventative maintenance. When done well, it reduces callouts, improves tenant satisfaction, and protects asset value.
Which parts of a building benefit most from “sensor-assisted” rodent monitoring?
Sensors and monitoring tools are most useful in areas that are hard to inspect frequently or where early detection prevents major repairs:
- Lofts/attics: Motion/temperature changes and gnawing often go unnoticed until insulation is damaged.
- Basements and crawl spaces: High humidity, hidden pipework, and limited access make these prime risk zones.
- Plant rooms and service risers: Warmth and penetrations for cables/pipes create frequent entry opportunities.
- Commercial bin stores: Persistent food odours and foot traffic can mask early signs.
Practical monitoring options include battery-powered motion sensors, door contact sensors on external storage areas, and scheduled “proofing audits” supported by a simple checklist. Some property managers also use smart leak detectors; reducing persistent dampness is one of the most effective long-term deterrents.
What’s the best way to do a “data-driven” inspection without expensive equipment?
You can create a surprisingly effective system with a smartphone, a notepad (or spreadsheet), and consistent inspection categories. Here’s a low-cost approach used by many facilities teams:
- Map the building: Divide it into zones (e.g., front elevation, rear elevation, roofline, basement, kitchens, bin areas).
- Score each zone monthly: Rate “entry points,” “food access,” “water/moisture,” and “clutter/harbourage” from 0–3.
- Photograph vulnerabilities: Take before-and-after photos of gaps, damaged air bricks, broken seals, or cracked vents.
- Log recurring hotspots: If the same gap reopens, it’s telling you something about movement, poor materials, or installation methods.
Real-world example: a small block of flats repeatedly saw droppings in a ground-floor cupboard. A photo log showed the issue returned after heavy rain—leading to discovery of a damaged air-brick and damp subfloor conditions. Fixing the air-brick with a rodent-resistant mesh insert and addressing drainage resolved both moisture and rodent activity.
Which modern building materials unintentionally create rodent entry opportunities?
Some newer materials and retrofit choices can inadvertently make entry easier if details are missed:
- Composite cladding and soffits: Poorly finished edges can leave concealed voids along the roofline.
- Spray foam and soft fillers: Rodents can chew through many foams; they’re not a substitute for rodent-proof barriers.
- Plastic air vents and ducting: Thin plastics can be gnawed; consider metal-backed or rodent-rated components.
- Cable and pipe penetrations after upgrades: New EV chargers, fibre lines, and heat pump services can introduce fresh gaps if not sealed correctly.
A good rule: if a material can be cut with a utility knife, assume it can be compromised by gnawing unless protected with metal mesh, cementitious repair, or purpose-made rodent-proof collars.
How do I seal gaps properly without causing ventilation or moisture problems?
One common DIY mistake is sealing everything airtight without understanding airflow needs. Good rodent proofing blocks entry while preserving required ventilation:
- Use rodent-resistant mesh on vents: Fit stainless steel or galvanised mesh sized to maintain airflow while preventing entry. Avoid blocking air bricks entirely—use inserts designed for ventilation.
- Choose the right seal for the gap: For small gaps around pipes, use rodent-proof collars or a combination of wire wool (stainless) and exterior-grade sealant—never foam alone.
- Repair, don’t “cover” rot: If timber is soft, repair the underlying issue (often moisture) before sealing.
- Maintain drainage and ground levels: Soil or mulch piled against walls can bridge the damp-proof course and create hidden routes into cavities.
Actionable tip: do a “night gap test.” After dark, have one person stand inside with lights off while another shines a bright torch along the exterior junctions (pipes, sills, door thresholds). Any visible light from outside indicates a potential entry point worth addressing.
What are the highest-impact maintenance tasks to reduce rodent attraction year-round?
If you only do a few things, focus on these because they remove the conditions rodents rely on:
- Waste control: Ensure bin lids close fully, clean bin stores regularly, and keep bags off the ground. Even “sealed” bin areas can leak odour; regular wash-down reduces attractants.
- Moisture management: Fix dripping overflows, leaking outdoor taps, and slow plumbing leaks under sinks. Damp voids are high-value habitat.
- Vegetation and storage: Trim dense ground cover near walls and keep stored items on shelving with visible clearance.
- Door and threshold upkeep: Replace worn brush strips and fit metal kick plates where gnawing is likely.
Data point to guide budgeting: routine exclusion and proofing is often far cheaper than repairs to wiring, insulation replacement, or repeated reactive pest visits—especially in multi-unit properties where one weak point can affect multiple flats.
Can smart doorbells, cameras, or thermal tools help identify rodent routes?
They can help indirectly. While you won’t usually “see” rodents clearly on standard doorbells, cameras can reveal patterns that correlate with rodent activity:
- Night-time movement near bin stores: Regular motion triggers can indicate activity, especially if paired with droppings sightings.
- Entry timing: Repeated motion at the same hour may point to predictable foraging routes.
- Thermal imaging (even basic): Can highlight missing insulation, warm voids, and potential harbourage zones around boilers or behind kitchen units.
Use these observations to target proofing and sanitation, not to replace physical inspection. The goal is to confirm where to spend time and money.
How should landlords and property managers handle rodent proofing in multi-unit buildings?
Multi-unit buildings need a coordinated plan because rodents move through shared voids, service penetrations, and communal waste areas. Best practice includes:
- Centralised reporting: A simple form or email alias for tenants to report sightings, gnawing, or odours. The speed of reporting often determines the scale of damage.
- Standardised repairs: Use consistent materials (metal mesh, appropriate sealants, rodent-proof vents) so fixes don’t fail in different flats.
- Communal area priority: Bin stores, risers, basements, and shared kitchens/laundries should be inspected on a set schedule.
- Tenant guidance: Clear rules on waste storage, feeding birds near entrances, and avoiding food storage in vulnerable areas.
Real-world example: a property manager reduced recurring callouts by introducing quarterly “service penetrations checks” after broadband upgrades. Installers had drilled new routes, leaving gaps behind skirting and in cupboards. Standardised grommets and collars reduced re-entry significantly.
What health and safety considerations should be included in a rodent-proofing maintenance plan?
Rodent activity is linked to contamination risks and can affect building hygiene. Maintenance teams should treat droppings, nesting materials, and contaminated insulation as a safety issue:
- PPE and cleaning protocols: Avoid dry sweeping; use appropriate disinfectants and sealed disposal methods.
- Electrical safety: If gnawing near cables is suspected, isolate circuits where appropriate and have a qualified electrician inspect before re-energising.
- Documentation: Keep a record of sightings, proofing works, and follow-up inspections. This supports compliance and helps identify trends.
For broader context on rodents and the risks they can pose, resources from established news and science desks can be useful background reading; for example, BBC News coverage on rats and urban pest issues often summarises expert commentary and public health angles in an accessible way.
How do I know if proofing worked, and what’s a realistic follow-up schedule?
Proofing “worked” when you see a sustained reduction in signs of activity and no new entry evidence. Use measurable indicators:
- No new droppings or smear marks in known hotspots over 2–4 weeks.
- No fresh gnawing on door edges, stored items, or service penetrations.
- Stabilised monitoring results (fewer motion triggers in high-risk zones, fewer tenant reports).
A practical follow-up schedule:
- 48–72 hours after repairs: Quick visual check of repaired gaps and seals.
- 2 weeks: Re-inspect hotspots and confirm no new signs.
- Seasonal (quarterly): Full perimeter walk, bin area inspection, and loft/basement spot checks.
Rodent pressure often increases in colder months as animals seek warmth, so autumn is an ideal time for a thorough proofing audit.
Conclusion: What’s the simplest “smart” rodent-proofing plan a property owner can start this month?
A smart plan doesn’t require a complex tech stack. Start with a disciplined routine that combines exclusion, moisture control, and verification:
- Week 1: Do a perimeter inspection and photograph every gap, damaged vent, or suspect penetration.
- Week 2: Prioritise top 5 vulnerabilities (bin store, doors, air bricks, service entries, roofline) and repair with rodent-resistant materials.
- Week 3: Address moisture and waste control (fix leaks, clean bin areas, improve storage practices).
- Week 4: Re-check and document results; set a quarterly reminder for repeat inspections.
By treating rodent proofing as an ongoing property maintenance system—supported by simple monitoring and consistent follow-ups—you’ll reduce surprise infestations, protect building fabric, and keep small vulnerabilities from becoming expensive repairs.

Heat, Drought, and Rats: Climate-Driven Rodent Surges & How to Rodent-Proof Your Home for the Next Wave
Rodent problems rarely arrive on a calm schedule. One month your home feels secure; the next, you notice droppings in the garage, scratching in a wall, or a sudden burst of activity around outdoor bins. Increasingly, these “boom-and-bust” infestations are linked to weather extremes: heat waves, drought, heavy rainfall, and abrupt cold snaps. These events don’t just change the landscape; they change rodent behavior, movement patterns, and breeding success.
This guide explains why climate-driven rodent surges are becoming a real-world pest control challenge, what that means for homeowners and property managers, and how to rodent-proof proactively—before the next weather swing pushes rats and mice into your structure.
Why extreme weather can trigger sudden rodent activity
Rodents are highly adaptable, but they still depend on three basic resources: food, water, and shelter. Extreme weather reshuffles those resources in ways that can rapidly increase pressure on homes and buildings.
Heat waves and drought: “Water-seeking” rodents move indoors
During prolonged heat and drought, natural water sources shrink. Irrigated yards, dripping spigots, condensation lines from HVAC systems, and pet water bowls become reliable water points. Rats and mice will expand their foraging range to find hydration—often tracing utilities and landscaping into structures.
- What you may notice: activity near AC condenser pads, hose bibs, sprinkler valves, crawlspace vents, and garage thresholds.
- Why it matters: in hot conditions, rodents may take greater risks and enter earlier in the evening to secure water and cooler shelter.
Heavy rain and flooding: burrows fail and rodents relocate fast
When soil saturates, burrows can flood or collapse. Sewer systems can also overflow, displacing rats that normally thrive underground. The result is a rapid relocation into higher, drier areas—like attics, wall voids, and storage rooms.
- What you may notice: sudden sightings after storms, fresh tracks in mud, gnaw marks near doors, and nesting material pulled into sheltered corners.
- Why it matters: post-storm rodent pressure can spike within days, not weeks—especially if nearby construction or drainage changes disturb habitat.
Cold snaps after mild periods: rodents exploit openings you forgot existed
Even in generally warmer winters, short intense cold snaps push rodents to seek stable indoor temperatures. If the season was mild, you may not have done your usual “winterization”—and small openings around pipes, vents, and garage doors become high-traffic entry points.
Real-world signs you’re seeing a weather-driven rodent surge
Not every infestation is climate-driven, but these patterns are common when the environment is doing the pushing:
- Timing: a rapid onset right after a heat wave, major storm, or abrupt temperature shift.
- Location clustering: activity concentrated around water sources (drips, condensate lines) during drought.
- Multiple entry attempts: fresh gnawing around doors/vents and repeated sightings along the same exterior runways.
- Neighborhood effect: several nearby homes report rodents at once—often following flooding, sewer events, or landscape disturbance.
Data points: why the “rodent season” is less predictable now
Urban pest control operators have long noted that rodent complaints can spike after major weather events. While local conditions differ, broader climate variability is increasingly discussed as a driver of pest behavior and public health risk. For accessible reporting on how changing weather patterns and warming conditions can influence pest populations and disease ecology, see reporting at The Guardian’s climate and environment coverage, which frequently summarizes scientific findings and regional impacts.
The practical takeaway for homeowners is straightforward: if you plan rodent-proofing only around a traditional “winter rodent season,” you may get caught off guard. Instead, treat proofing as an all-year building maintenance task—especially after extreme weather.
A climate-smart rodent-proofing checklist (designed for weather swings)
The goal is to reduce the chance that a short-term surge becomes a long-term infestation. Prioritize exclusion (blocking entry) first, then habitat reduction (removing food/water/shelter), and finally monitoring.
1) Seal the “storm surge” entry points (fast wins within a weekend)
After heavy rain or flooding, rodents look for immediate refuge. These are the most common entry points to address quickly:
- Garage door corners and bottom seal: replace cracked seals and add a quality door sweep. If light can be seen, rodents can often squeeze through.
- Weep holes and siding gaps: don’t seal drainage weep holes completely; instead, use rodent-resistant screens designed for ventilation/drainage applications.
- Utility penetrations: pipes and cables entering the home should be sealed with rodent-resistant materials (e.g., metal flashing, hardware cloth, or appropriate sealant combined with backing).
- Crawlspace vents: install corrosion-resistant mesh sized to block mice while maintaining airflow.
Actionable tip: do an exterior “gap audit” at dusk with a flashlight. Walk the foundation line and mark openings with painter’s tape. Anything around the size of a dime can be a mouse entry risk; larger gaps increase rat risk. (Exact squeeze-through size varies, so treat small gaps seriously.)
2) Drought-proof your yard so rodents don’t follow the water
In hot, dry stretches, rodents become experts at finding irrigation leaks and condensation water. Reduce attraction points:
- Fix leaks within 24–48 hours: dripping spigots, irrigation valve leaks, and hose connections are rodent magnets during drought.
- Manage HVAC condensation: ensure condensate lines drain properly and don’t create a persistent wet patch next to the foundation.
- Move water bowls: if you leave water for pets outdoors, place bowls away from walls and bring them in overnight.
- Mulch and groundcover discipline: thick mulch against the foundation provides cool cover. Keep a vegetation-free buffer of 12–18 inches where possible.
Real-world example: homeowners often find rodent burrows near AC units because the area stays shaded and damp from condensation. A simple change—redirecting the drain and trimming nearby groundcover—can reduce activity dramatically.
3) Upgrade your trash setup for “heat-wave conditions”
High temperatures accelerate odor and food breakdown, making bins more enticing. Tighten your waste system:
- Use latching bins: lids should close fully and resist being pried open.
- Rinse containers: a quick rinse of sticky residue reduces scent trails.
- Freeze smelly scraps: if possible, store meat scraps in the freezer until pickup day.
- Bin placement: keep bins on a hard surface and away from fences or overgrown areas that provide “runways.”
4) Weather-proof the “roofline” (often overlooked)
After storms, rodents may climb to avoid saturated ground. Roofline access is a common blind spot:
- Trim branches: keep tree limbs at least several feet from the roof to reduce bridging access.
- Inspect attic vents: gable vents, soffits, and ridge vents should have intact screens.
- Check chimney caps: ensure caps and spark arrestors are properly secured and meshed.
Actionable tip: look for rub marks (greasy smears) along edges and pipes—these are “highway” indicators showing repeated rodent travel routes.
5) Choose smart monitoring during high-risk weeks
When weather shifts dramatically, don’t wait for obvious signs. Add temporary monitoring for 2–4 weeks:
- Non-toxic tracking patches or cards: identify movement without adding attractants.
- Snap traps in protected boxes: where appropriate and safe from pets/children, they can confirm species and activity level.
- Camera checks: a basic motion camera near bins or a suspected entry route can save time and guesswork.
What to do if a surge is already happening
When you’re in the middle of a rodent spike, speed matters—but so does sequence. Avoid the mistake of “trap first, seal later” if rodents are actively entering through multiple points. You can accidentally push them deeper into walls or create new routes.
- Step 1: Identify the entry route: look for droppings, gnawing, rub marks, and disturbed insulation. Outside, look for burrows and narrow runs through grass.
- Step 2: Reduce attractants immediately: secure food, clean spills, move pet food indoors, and fix water leaks.
- Step 3: Strategic exclusion: seal secondary gaps first, then address the main entry after you have monitoring/trapping in place. (This approach helps avoid trapping rodents inside.)
- Step 4: Escalate when needed: if you have repeated sightings in living spaces, daytime activity (often a sign of high pressure), or signs in attic/crawlspace, consider professional help to locate hidden entry points and assess sanitation and structural vulnerabilities.
Conclusion: Rodent-proofing works best when it’s built for extremes
Rodents are opportunists, and extreme weather events create opportunities—by forcing movement, concentrating resources, and stressing natural habitats. The most resilient pest control strategy is proactive: seal the structure, remove water and food attractants, and monitor during high-risk periods like heat waves, floods, and sudden cold snaps.
If you treat rodent-proofing as a “once-a-year” chore, climate variability can catch you off guard. But if you align your prevention plan with weather-driven risk—especially around water management, roofline access, and waste control—you can reduce the odds that the next surge ends up inside your walls.
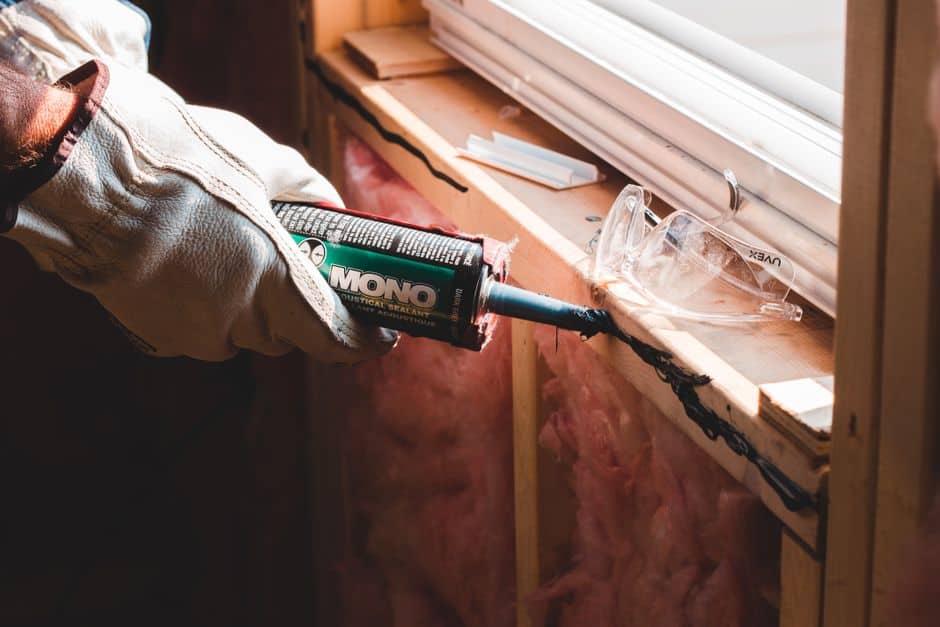
9 Overlooked Home Service Fixes That Quietly Block Rodents (Without a Full Remodel)
Why “rodent proofing” is suddenly a home services power move
Rodent proofing has had a glow-up lately. It’s not just about traps or panic-calling a pest company after you hear scratching at 2 a.m. Homeowners are realizing that a lot of rodent problems are really home services problems: gaps, moisture, broken seals, sloppy utility penetrations, and neglected maintenance schedules.
This roundup pulls together practical, specific fixes you can request from common home service pros (HVAC, plumbing, roofing, insulation, landscaping, cleaning, handyman, and more). The idea is simple: rodents don’t “appear” — they enter, eat, nest, and repeat. Remove the opportunities, and you don’t just solve a problem; you prevent it.
Quick reality check: mice can squeeze through holes about the size of a dime (roughly 6–7 mm), and rats can fit through gaps about the size of a quarter (around 20 mm). That’s why the most effective “rodent control” sometimes looks like caulk, steel wool, door sweeps, and schedule-based maintenance.
Roundup: 9 home service fixes that stop rodents at the source
1) The “utility line audit” (handyman + pest pro collaboration)
Most rodent entries aren’t dramatic. They’re boring: cable TV lines, AC refrigerant lines, hose bibs, gas lines, and electrical conduits that pass through siding and brick.
- Ask for: a walk-around inspection specifically looking for any penetration bigger than 1/4 inch.
- Best materials: copper mesh or stainless-steel wool (not regular steel wool), plus exterior-rated sealant. For larger voids, request metal flashing or a mortar patch.
- Pro tip: spray foam alone is not rodent-proof. If foam is used, it should be backed with metal mesh first.
Real-world example: Homes with fiber internet often have a tidy install indoors, but the exterior penetration can be loosely sealed. One 1-inch gap around a cable is basically a welcome sign to mice — especially as temperatures drop.
2) Door sweep upgrades that actually work (garage door companies are your secret weapon)
Garage doors are common rodent highways. The rubber bottom seal compresses unevenly, the corners lift, and suddenly there’s a gap you could slide a thumb through.
- Ask for: a new bottom seal plus side weatherstripping (many homeowners only replace the bottom).
- Don’t forget: the door from the garage into the home. Add a heavy-duty sweep and threshold.
- Test it: at night, put a bright light inside the garage and look from outside. If you see light, rodents see a doorway.
3) Dryer vent “clean + armor” (HVAC/duct cleaning with a rodent twist)
Dryer vents are warm, linty, and often poorly protected. A clogged vent also increases fire risk, which is why this fix does double duty.
- Ask for: a dryer vent cleaning plus installation of a proper critter-resistant vent hood (metal, with a damper that closes tightly).
- Avoid: flimsy plastic hoods and loose screens that clog with lint.
- Actionable tip: if the vent pipe is foil flex duct, upgrade to rigid or semi-rigid metal to reduce hiding spots and lint buildup.
4) Roofline and soffit triage (roofers catch what pest inspections miss)
Rodents don’t only enter at ground level. Rats are surprisingly good climbers, and roof edges are full of opportunities: gaps at fascia boards, broken soffit vents, lifted drip edges, and uncapped openings.
- Ask for: a targeted inspection of eaves, returns, and roof-to-wall intersections (especially behind gutters).
- Fixes that matter: replace broken vents with metal-mesh-backed vents; repair rotted fascia; seal gaps near attic fan housings.
- Pro tip: chimney caps and flue screens are non-negotiable if you’ve seen droppings in the fireplace or heard fluttering.
5) Crawlspace moisture control (the underrated “rodent magnet”)
Rodents follow water. A damp crawlspace grows mold, attracts insects (rodent food), and stays warmer in winter. Many infestations calm down dramatically after moisture control, even before major exclusion work.
- Ask for: a vapor barrier, sealed vents (where appropriate for your climate), and a crawlspace dehumidifier with a drain line.
- Also check: plumbing leaks under kitchens and baths that drip into the crawlspace.
- Data point: keeping indoor relative humidity around 30–50% is widely recommended for comfort and mold prevention; it also makes spaces less attractive for pests that thrive in damp conditions.
6) “Food source hardening” via cleaning services (yes, really)
If you want rodent proofing to stick, you need a boring but powerful service: a deep clean with a pest-prevention checklist. Many homeowners clean what they can see, but rodents are drawn to what’s behind appliances and inside storage zones.
- Ask for: a move-out-style deep clean focusing on kitchen kick plates, under the stove, pantry floors, and pet feeding areas.
- Upgrade your storage: transfer dry goods (flour, cereal, pet food) into hard plastic or glass containers with gasket lids.
- Real-world example: pet food left in a paper bag in the garage is a top “starter buffet” for mice. A $15 sealed bin can prevent a $500 infestation.
7) Attic insulation refresh (insulation contractors can “erase” nesting zones)
Attics become rodent condos when insulation is thin, disturbed, or contaminated. If you’ve had activity for a while, old insulation can hold odors that encourage repeat visits.
- Ask for: a contamination assessment and removal if droppings/urine are present, then air-sealing (with metal mesh where needed) before adding new insulation.
- Bonus: air sealing reduces drafts and can lower heating/cooling costs.
- Tip: pay attention to recessed lights, attic hatches, and plumbing stacks—these are common bypasses into living spaces.
8) Landscaping “rodent runway” reductions (yard crews can prevent interior problems)
Overgrown landscaping acts like cover. If shrubs touch siding or tree branches hang over the roof, you’re giving rodents protected travel lanes.
- Ask for: trimming branches at least 3 feet away from the roofline and thinning dense groundcover near foundations.
- Do this today: keep mulch pulled back a few inches from the foundation and avoid piling firewood against the house.
- Pro tip: if you feed birds, use seed catchers and clean spilled seed weekly—spilled seed is rodent candy.
9) Trash, compost, and community-level prevention (a surprisingly modern concern)
Urban and suburban rodent pressure is increasingly tied to waste management. Overflowing bins, loose lids, and compost piles that aren’t managed correctly can raise rodent activity in an entire block.
- Ask for: a sturdier bin with a tight-fitting lid; consider bungee cords if animals knock lids loose.
- Compost smarter: avoid meat/dairy; bury food scraps in the center; use a rodent-resistant tumbler if activity is high.
- Worth reading: for broader context on how cities are responding to rodent pressure and waste practices, check reporting from The Guardian’s coverage on urban rats and public sanitation.
How to turn this roundup into a simple “rodent-proofing work order”
If you’re juggling multiple contractors, keep it simple. Copy/paste a version of this when requesting estimates:
- Inspect and seal all exterior penetrations (mesh + exterior sealant; no foam-only).
- Replace/upgrade weatherstripping and door sweeps (including garage).
- Clean dryer vent and install critter-resistant metal hood.
- Inspect roofline/soffits/vents; repair any gaps; install metal-mesh-backed venting where needed.
- Assess crawlspace/attic for moisture and contamination; recommend remediation.
- Provide photo documentation of “before/after” for every sealed point.
That last bullet (photos) sounds picky, but it prevents the classic problem: you pay for “sealed gaps” and have no idea what was actually addressed.
Conclusion: rodent proofing is a maintenance strategy, not a one-time event
The best rodent-proof homes aren’t the newest or the fanciest — they’re the ones where small gaps get handled quickly, moisture is controlled, and food sources are locked down. If you take only one thing from this roundup, make it this: pair exclusion (blocking entry) with prevention (removing the reasons rodents stick around). That combo is what turns a stressful, recurring issue into a boring non-issue — the best kind of home service win.
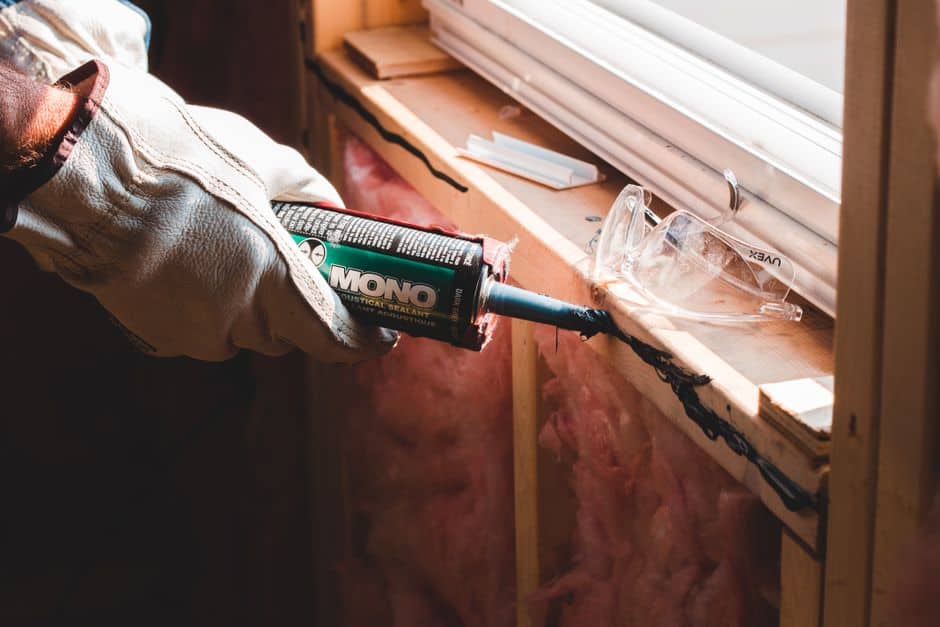
9 Smart, Overlooked Places Rodents Sneak In (And How to Rodent-Proof Them for Good)
Why “Almost Sealed” Homes Still Get Mice and Rats
Most rodent problems don’t start with a dramatic hole in a wall. They start with a “harmless” gap: a cable pass-through, a loose vent, a settling crack, or a door that never quite latches tight. Mice can squeeze through openings about the size of a dime (roughly 1/4 inch), and young rats can fit through gaps closer to 1/2 inch. That’s why homes that look solid from the street can still have scratching in the ceiling at night.
This list focuses on specific, often-missed entry points that cause repeat infestations—especially in modern builds and renovated properties where utilities and ventilation systems create new pathways. Each item includes what to look for, how to fix it, and practical material choices that hold up over time.
1) The “Utility Cluster” on One Exterior Wall (AC Lines, Internet, Gas, Drain, and Power)
Why it’s a hotspot: Many houses concentrate multiple penetrations in one area—often near the AC condenser, meter, or communications box. Installers frequently use expanding foam alone, which rodents can chew and tunnel through.
What to check:
- Gaps around refrigerant lines and PVC condensate drains
- Cable/phone conduits (especially where they enter the siding or brick)
- Meter bases and service conduits where they meet the wall
How to fix it (durable method): Use a layered approach: pack the void with copper mesh or stainless-steel wool (not regular steel wool outdoors—it rusts), then cover with an exterior-grade sealant (polyurethane works well) or a patch material matched to the surface (mortar for masonry, appropriate flashing for siding). The goal is to make the gap both filled and chew-resistant.
Real-world tip: If you can insert the tip of a pencil into a gap, treat it as suspect—especially within 18 inches of grade where rodents travel.
2) The Garage Door Side Gaps and Top Corners (Not Just the Bottom Seal)
Why it’s overlooked: People replace the bottom seal but ignore the jamb weatherstripping and the upper corners where panels don’t meet the frame tightly. Those corners are common entry points for mice seeking warmth.
What to check:
- Daylight visible along the sides when the door is closed
- Warped or hardened vinyl jamb seals
- Gaps at the top corners where the door curves into the track
How to fix it: Replace side and top weatherstripping with a rodent-resistant or reinforced product if available. For stubborn corner gaps, add a small piece of L-shaped metal flashing or corner seal kit to eliminate the void. Ensure the door closes square; track misalignment can create “phantom gaps.”
Actionable standard: Aim for a uniform seal—no gap greater than 1/4 inch anywhere around the perimeter.
3) Roof-to-Wall Intersections and “Kick-Out” Flashing Gaps
Why it’s a problem: Where a sloped roof meets a vertical wall, tiny failures in flashing or siding edges can open up. Rodents use these ledges as highways to reach attic vents and soffit returns.
What to check:
- Loose or missing kick-out flashing where roof runoff meets the wall
- Gaps behind fascia boards and at roofline trim joints
- Water staining—moisture often correlates with gnawing and rot
How to fix it: Repair flashing with proper overlap and corrosion-resistant fasteners. Seal small trim gaps with paintable exterior sealant, but don’t rely on caulk where metal flashing is required. If wood is soft, replace it; rodents exploit rot because it’s easy to enlarge.
Practical insight: Even if you don’t see rodents, roofline moisture issues can escalate quickly. Keeping up with building-envelope repairs is one of the most cost-effective prevention strategies.
4) Dryer Vent Terminations (Especially Plastic Hoods and “Flapper” Styles)
Why it’s high-risk: Warm, lint-scented air attracts animals, and poorly designed vents are easy to pry open. Some covers also stick open due to lint buildup, creating a permanent entry.
What to check:
- Broken or missing louvers/flappers
- Plastic vents that have become brittle from sun exposure
- Lint mats around the exterior outlet (a sign of restriction)
How to fix it: Install a metal, rodent-resistant dryer vent cover with a functional damper designed for airflow. Avoid screens on dryer vents because they can trap lint and become a fire hazard; instead use a purpose-built damper that closes fully. Clean the entire duct line periodically—restricted airflow is a safety issue and a maintenance issue.
Data point (safety perspective): Dryer vent restriction is a known contributor to dryer-related fire risk; keeping airflow unobstructed while preventing pests is a balance that requires the right termination hardware.
5) The “Soffit Return” Above Porches and Bay Windows
Why rodents love it: Architectural features like porches, overhangs, and bay windows create sheltered voids. The soffit return (where soffit meets wall/trim) can separate over time, especially with wind-driven rain and temperature swings.
What to check:
- Loose perforated soffit panels (they can flex and pop out)
- Gaps where soffit meets brick, stucco, or siding
- Nesting debris visible through vent perforations
How to fix it: Refasten soffit panels properly, then reinforce vulnerable edges with metal trim coil or hardware cloth backing where appropriate. If soffits are vented, ensure vents are intact and not torn. Rodent-proofing is not about blocking all ventilation; it’s about maintaining ventilation with openings small and strong enough to resist chewing.
Real-world example: Homes with porch overhangs often report “rodents only in the front half of the attic”—the soffit return above the porch is frequently the culprit.
6) HVAC Fresh-Air Intakes and Make-Up Air Ducts (The New-Build Surprise)
Why it’s trending: Tighter modern homes use dedicated ventilation, fresh-air intakes, and make-up air for range hoods. These systems can become unintended entry points if exterior terminations aren’t properly screened with chew-resistant materials.
What to check:
- Outdoor air intake hoods with wide louvers
- Loose duct connections in the attic or crawlspace
- Gaps around intake housings where they meet sheathing
How to fix it: Use galvanized or stainless hardware cloth (commonly 1/4-inch mesh) secured mechanically (screws/washers), not just glued. Confirm the screen doesn’t restrict airflow below manufacturer specs. If you’re uncertain, consult your HVAC contractor; airflow matters for indoor air quality and equipment performance.
Extra step that prevents repeat calls: Seal the interior duct chase penetrations too—rodents may enter the chase elsewhere and travel to the intake line.
7) Deck Ledger Boards and Siding Gaps (The Hidden “Rodent Tunnel”)
Why it’s missed: Where a deck attaches to the house (ledger board), there can be gaps behind flashing or along siding transitions. Rodents can move behind the ledger into wall cavities, then up into floor systems.
What to check:
- Improper or missing ledger flashing
- Gaps between siding and deck boards
- Soft wood or staining near attachment points
How to fix it: Correct flashing details (often a carpentry task) and seal minor gaps with appropriate exterior materials. If you find rot, repair it—rodent proofing won’t hold if the substrate is failing. Consider adding a metal barrier strip at known gnaw points where siding meets deck structure.
Actionable tip: Keep vegetation and stored items (bags of soil, planters, stacked lumber) away from the ledger area. Clutter creates cover and encourages exploration.
8) Crawlspace Access Doors and Rim Joist Vents (Where “Good Enough” Isn’t)
Why it causes infestations: Crawlspaces are naturally attractive: dark, quiet, and often humid. A poorly sealed access door or vent creates a stable entry that rodents use repeatedly.
What to check:
- Warped crawlspace doors that don’t sit flush
- Broken vent screens or oversized vent openings
- Gaps at the rim joist where pipes and wires penetrate
How to fix it: Upgrade to a rigid, well-framed access door with secure latches and perimeter sealing. Replace vent screens with metal mesh (not plastic). Seal penetrations at the rim joist with a combination of backing (mesh) and sealant. If humidity is high, address moisture with vapor barriers and drainage improvements; moisture can increase insect activity, which can in turn attract rodents.
Real-world metric: After sealing crawlspace access points, homeowners often notice fewer “mystery odors” and fewer pest sightings within weeks, because you’re reducing the pathway and the habitat simultaneously.
9) Trash, Bird Feeders, and Outdoor Storage Habits That Undermine Your Sealing Work
Why it matters: Sealing entry points is critical, but pressure from outside populations determines how often rodents test your defenses. Food availability within 30–50 feet of the home is a major driver of repeat attempts.
What to check:
- Trash bins without tight-fitting lids or with chewed edges
- Bird feeders spilling seed (especially at night)
- Pet food stored in garages in thin plastic bags
- Compost piles placed against the house
How to fix it: Use hard-sided containers (metal cans or thick plastic with locking lids). Bring bird feeders in at dusk or switch to no-mess seed and a tray that catches spill. Store pet food in sealed bins. Move compost away from the structure and avoid adding meat/fat scraps. If you need a broader view of how rodent issues impact communities and supply chains, reputable newsrooms regularly cover outbreaks and prevention efforts; for example, Reuters reporting on public health and environmental conditions can provide useful context on why proactive prevention matters.
Bottom line: Reduce attractants and you reduce the number of “tests” your home’s exterior has to endure.
Conclusion: Build a Rodent-Proofing Plan That Stays Fixed
Rodent proofing works best when you treat it like an exterior durability project, not a one-time patch job. The most persistent infestations usually trace back to one or two overlooked locations—utility clusters, garage side gaps, soffit returns, or ventilation terminations—paired with outdoor conditions that keep rodents nearby.
Use this checklist to conduct a structured walk-around: start at grade, move to the utility wall, then the garage, then rooflines/soffits, then crawlspace. Prioritize fixes that are both chew-resistant and weatherproof. When you combine strong materials (metal mesh, flashing, proper fasteners) with sensible outdoor habits (secure trash, manage feed sources), you dramatically lower the odds of rodents getting in—and even more importantly, you keep them from trying.